A person who has previously faced data loss situation truly understands the importance of backup. Around 4 years ago, I never used the backup. I always thought it’s unnecessary and a time-consuming task. One day, I deleted some of my crucial files by mistake. I couldn’t restore them back from the Recycle bin. It was a permanent deletion using Shift + Del. All said that I should use backup to restore my lost files. But that was just impossible. I had no backup. Finally, I had to purchase a file recovery tool to restore my files back. Had I used the backup, I would have saved my money. On that day, I decided to take backup of my crucial data every single week.
Importance of Backup
Unfortunately, if anything goes wrong with your computer, your data is still safe if you have the backup. A backup file can contain duplicate copies of your crucial information, and you can save it in a remote location. So if you face data loss situation due to any reason, you have 100% chances to restore your data back. You can take backup of almost everything, such as documents, photos, audio files, video files, emails, etc.
If everything is fine, we don’t need a backup. The importance of backup is only understood when we face data loss situation. There are two common reasons for data loss: deletion and corruption. If you delete something using Shift+Del, it’ll cause permanent deletion. The data which is permanently deleted, can’t be restored until you have the backup file. Generally, I don’t recommend permanent deletion unless it’s extremely necessary. In a case of temporary deletion, you can restore your data from the Recycle bin. But there’s no way to restore your data if you permanently delete it.
Another common reason for data loss is corruption, an inevitable occurrence. In a computer system, corruption can take place due to various reasons. Some of the highly responsible reasons include hard disk crash, logical failure, virus infection, hardware failure, software malfunction, abruptly system shutdown, etc. These are some situations in which you can face data loss unexpectedly. So if you confront a data loss situation due to any reason, be it accidental deletion or corruption, you can restore files from backup. Further, in this post, we’ll learn how to take backup.
How to Take Backup?
Over the past few years, computer users have become smarter than before. Many of them have started taking regular backup of their crucial information. And that’s really great. But some users still don’t know how to back up their data, though they understand the importance of backup. In this post, I’ll help them learn how to take backup using Windows Backup tool. So if you’re a Windows user, taking a backup is no more a hassle now. It’s very easy to use the Windows backup tool, commonly known as NTBackup utility. It’s a built-in backup utility firstly introduced in Windows NT. And since 1997, it has been a part of all subsequent versions up to and including Windows 2000, Windows XP and Windows Server 2003. In Windows Vista and later operating systems, it was replaced by Windows Backup and Restore.
The NTBackup utility uses a proprietary backup file format (.BKF) to take backup. You can take backup of the files to tape, ZIP drives, floppy disks, and hard disk drives.
Use Windows NTBackup Utility
Follow these simple steps to know how to take backup using NTBackup utility:
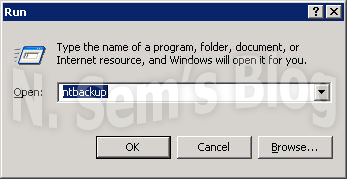
Step 1: First, go to the Run command prompt. Simply press Win + R buttons on the desktop.
Then type “ntbackup” and hit enter.
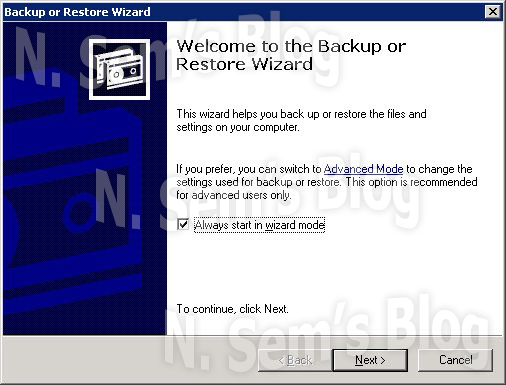
Step 2: The welcome screen of Backup or Restore Wizard will appear on your screen.
Just keep the “Always start in wizard mode” box checked. Click Next to continue the process.
Backup or Restore
Step 3: Now define what you want to do.
Choose Back up files and settings and Next to continue the process.
What to Back Up
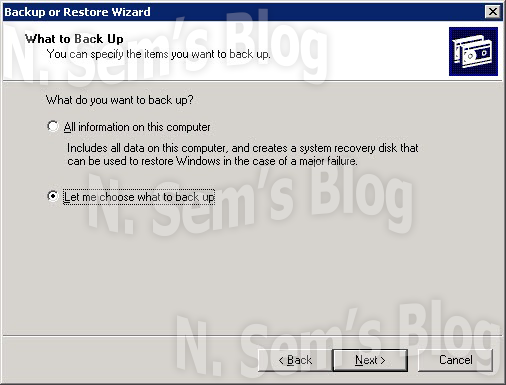
Step 4: Now specify the items you want to back up.
Choose All information on this computer to take backup of everything. Or, choose Let me choose what to back up to specify the data which you want to take backup. Click Next to continue the process.
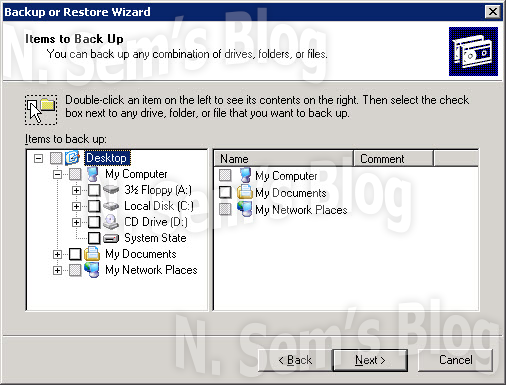
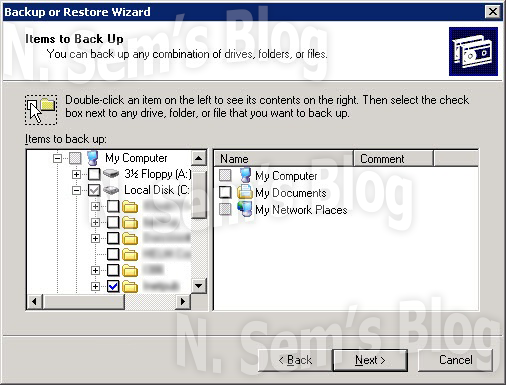
Step 5: Here you can back up any combination of drives, folders, or files. Double-click an item on the left to see its content on the right.
Then select the checkbox next to any drive, folder, or file that you want to back up.
Step 6: Suppose you want to take backup of a folder saved on Local Disk (C:). Click the checkbox next to Local Disk (C:).
Now I’ll click the checkbox next to the folder which I want to back up. Then click Next to continue the process.
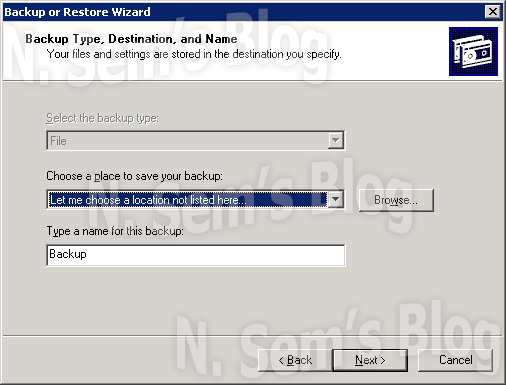
Backup Type, Destination, and Name
Step 7: Choose a destination where you want to save the backup file.
Click the Browse button.
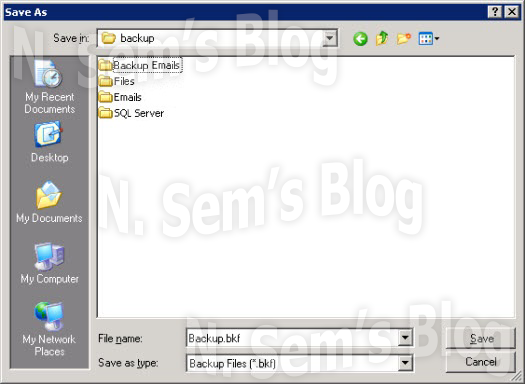
Step 8: Now browse to a location where you want to save this new backup file.
Click the Save button.
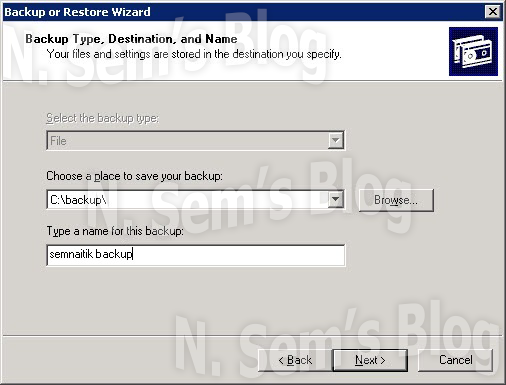
Step 9: Now type a name for this backup file.
Then click Next to continue the process.
The backup is now ready to use.
Advanced options
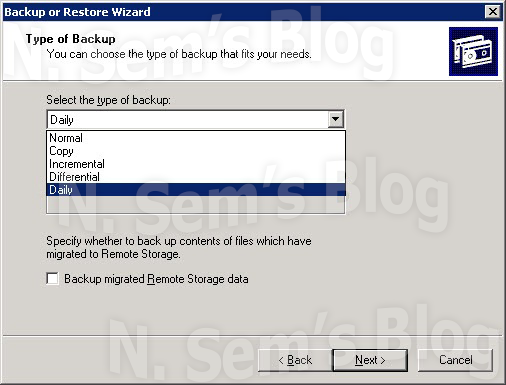
Step 10: But before that, if you want to specify additional backup options, you can click the Advanced… button.
Step 11: Now choose the type of backup that fits your needs. For e.g. click Daily in the options.
After that, click Next to continue the process.
Step 12: Here you can specify verification, compression, and shadow copy options.
Choose the Verify data after backup option, and click Next to continue the process.
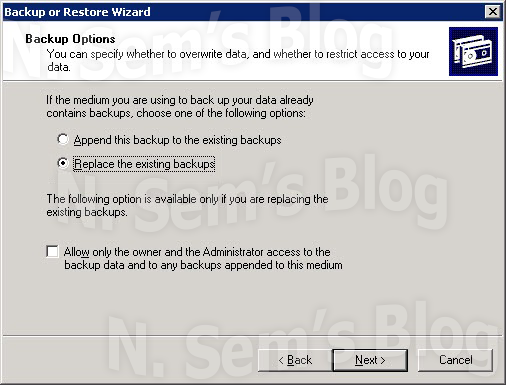
Step 13: Now you need to specify whether to overwrite data, and whether to restrict access to your data.
You should choose the Replace the existing backups option.
Things to remember…
Doing this will create a new backup set each time and keep the file size relative to the amount of data being backed up.
On the other hand, if you choose the Append this backup to the existing backups option, this will eventually accumulate a great deal of space on your hard drive (depending on what is being backed up).
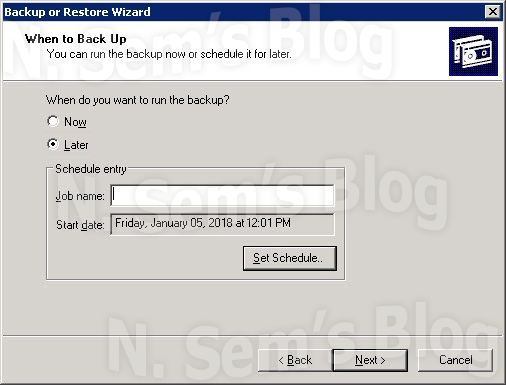
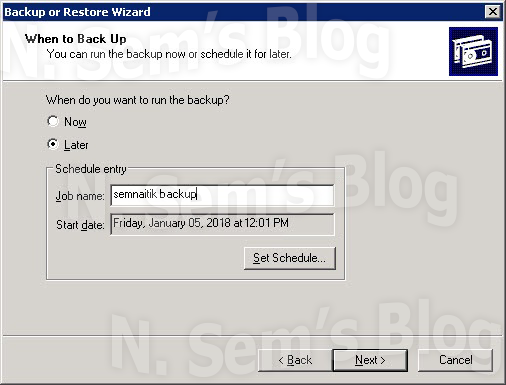
Step 14: You can now run the backup or schedule it for later.
Choose Later and click the Set Schedule… button.
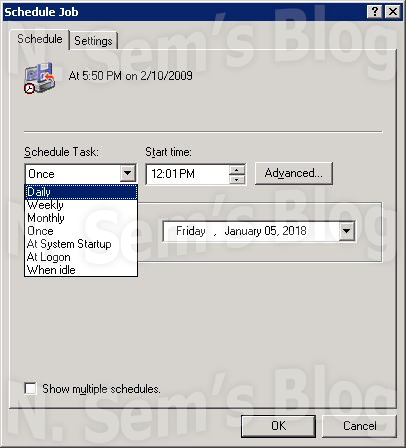
Step 15: Now you need to set how often you want to take backup.
Suppose you want to run the backup job once per day, click the drop-down list under Schedule Task, and choose Daily.
Step 16: Now you need to specify the start time.
Then click OK to confirm it.
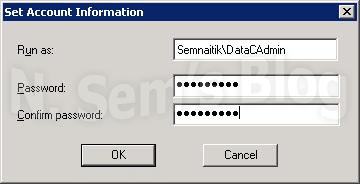
Step 17: You need to set the account information of the user under which you want to run the backup job.
Select the user and enter the correct password two times.
Step 18: Now verify that you’ve defined the correct schedule for the backup job.
Also, enter a name for this scheduled task. You can use the same name what you’ve used for the backup.
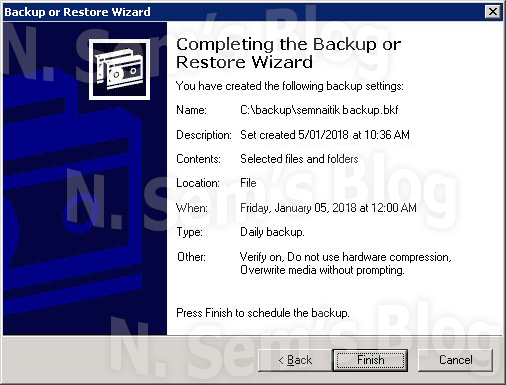
Step 19: You can now check the backup settings you’ve created.


 Over the past few years, computer users have become smarter than before. Many of them have started taking regular backup of their crucial information. And that’s really great. But some users still don’t know how to back up their data, though they understand the importance of backup. In this post, I’ll help them learn how to take backup using Windows Backup tool. So if you’re a Windows user, taking a backup is no more a hassle now. It’s very easy to use the Windows backup tool, commonly known as NTBackup utility. It’s a built-in backup utility firstly introduced in Windows NT. And since 1997, it has been a part of all subsequent versions up to and including Windows 2000, Windows XP and Windows Server 2003. In Windows Vista and later operating systems, it was replaced by Windows Backup and Restore.