-
Written By Danish
-
Updated on January 25th, 2025
Top 3 Ways To Backup Google Photos to Hard Drive
User Query – “Currently, my Google Account is running out of storage where Google Photos consumes 90% of storage. I want to keep all this storage safe and secure. When I go to take a paid subscription to Google Photos, it seems to be costly. I am searching for a free version where I can easily take a backup and store it for future purposes.”
Nowadays, users face so many difficulties to keep a backup of all their personal data like photos, videos, etc. Additionally, everyone is not able to pay or buy a paid subscription to Google Photos. So, they prefer to export Google Photos to Hard Drive. In this upcoming blog, we are going to tell you the numerous ways how you can straightforwardly backup Google Photos to hard drive. In case, if you don’t want to perform it manually, you can directly go with the Sysinfo Google Drive Migrator Tool.
![]()
![]()
What are the Different Ways to Backup Google Photos to Hard Drive?
In this section, we will go through the two different methods – manual and professional to move Google Photos to Hard Drive. Here we discuss both methods you can choose any of them as per your convenience.
- Download from Google Drive and Move to the Hard Drive
- Backup Google Photos to Hard Drive by using Google Takeout Feature.
- Local backup of google photos by using the third-party tool.
Note: First two methods are done by the manual method and the remaining will be done by the professional method.
Method 1: Download from Google Drive and Move to the Hard Drive
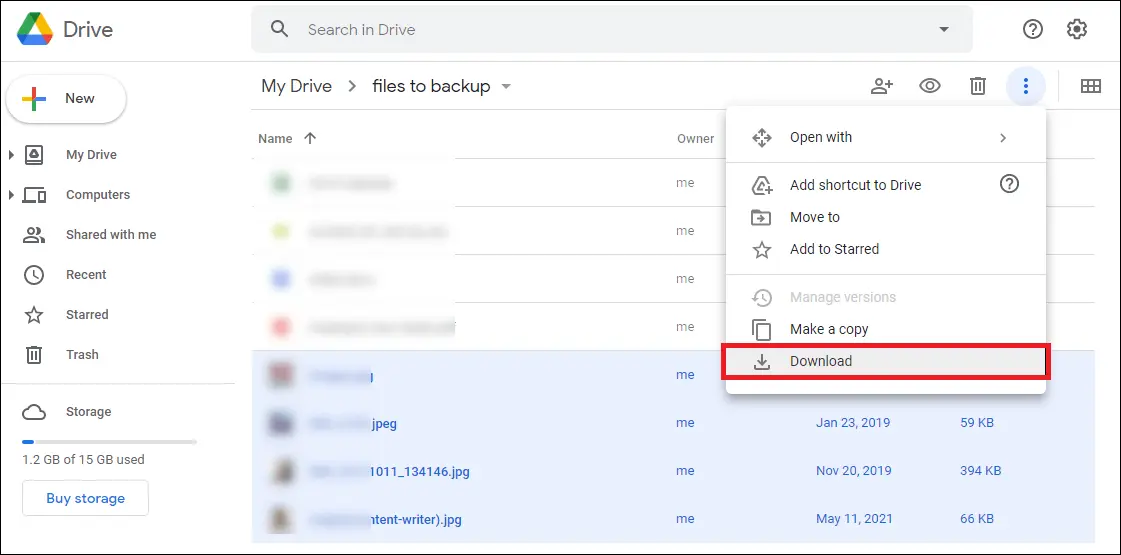
- First, log in to your Google Account, and then Go to Google Drive.
- Select the particular files that you want to move.
- Click on the three dots of your chosen file, then go to the downloads option.
- Now, users can see that their chosen files are started to convert into ZIP File format. They can also view their downloaded files.
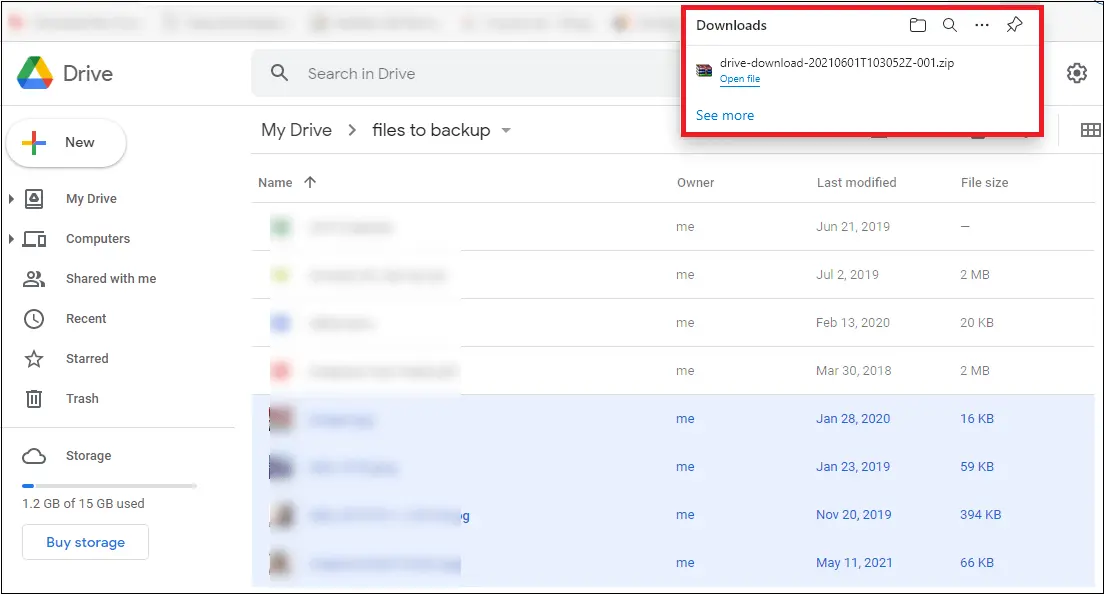
- Right-Click on your downloaded files and press the Send Option.
Therefore, your first method is successfully completed. Now move ahead to the next method to backup Google Photos to hard drive.
Method 2: Save Google Photos to External Hard Drive by using Google Takeout Feature.
- Download Google Takeout and do sign up with your credentials to your Google Account.
- After that, click on the Google Drive option and deselect all other options.
- Then, choose the file formats to migrate the files.
- Choose the image file format under the Drawings section. Click on the OK Button.
- Moving ahead, click on the Next button.
- Make sure to choose the frequency of export, and file size to manage the large size of folders or files. Select the file type > Export.
- Wait, till the process is finished of exporting. After that, a Download link will appear. Click on it.
Hence, you can see that your files are transferred to External Hard Drive by using Google Takeout Feature. These manual methods are good to perform but They may have limitations. Let’s discuss them too in the next part.
What are the Limitations of Performing the Manual Method?
- These methods are time-consuming and very lengthy for non-technical users.
- The major drawback while doing the manual method is that there is no assurance of transferring all data with 100% security.
- When we upload photos to Google, we can only access them while we are online.
- When the storage is running out of Google Photos, then you have to change to another account or you have to take a subscription from Google Drive.
Method 3: How to Download Google Photos to Hard Drive by Using an Automated Method:
If you are facing many problems or difficulties while doing the manual method, then you can easily go with the professional method which is very easy to perform. As a professional method, we are using the Sysinfo Google Drive Migrator Tool. It is the best solution to all your problems, It can easily backup Google Photos to hard drive within a few clicks.
This utility is designed in a way that every non-technical user can easily use this wizard without having a piece of prior knowledge. It exports all files, documents, videos, etc. from Google Drive to Hard Drive. This wizard is highly recommendable by IT Professionals due to its high accuracy rate.
Steps to Move Google Photos to Hard Drive
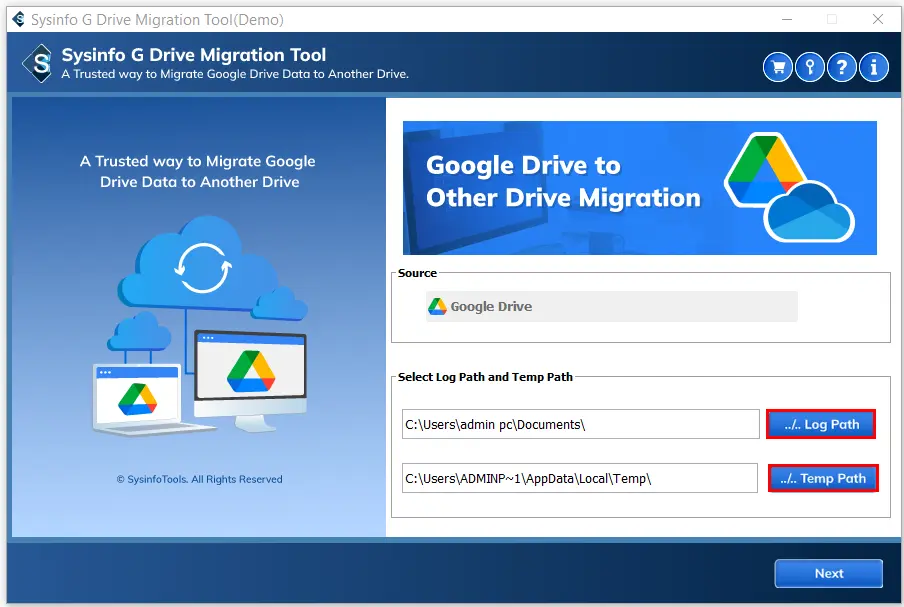
- First, Launch and Run the software on your local system.
- Users can see on their screen that two options are showing – Log Path and Temp Path.
- After that, Hit on the Next Button. Then, Click on the Another Account in the Account Box. Click on the OK button.
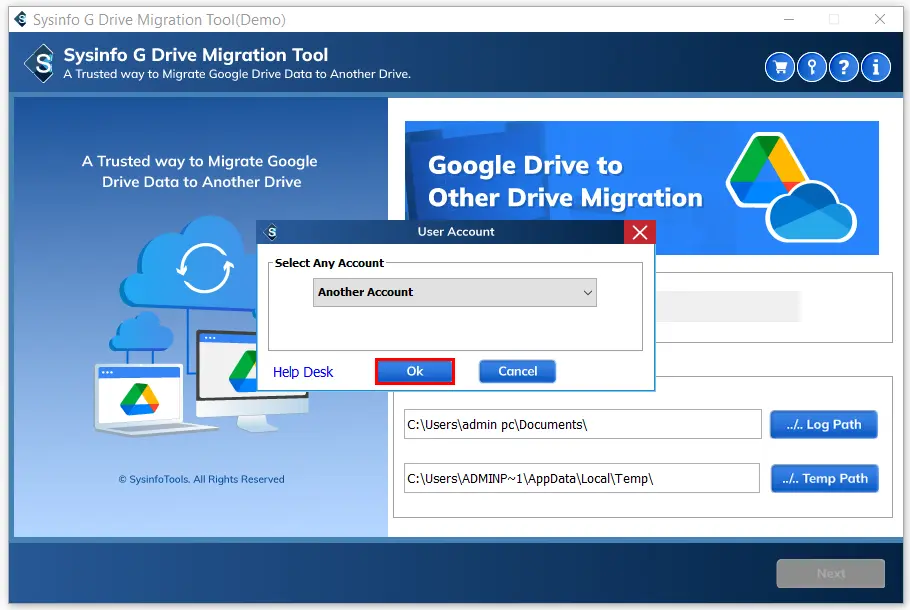
- Make sure to choose the account for browsing.
- Then, log in to your Google Drive.
- Moving ahead, users can straightforwardly see the preview of their selected files. Click on the Next button.
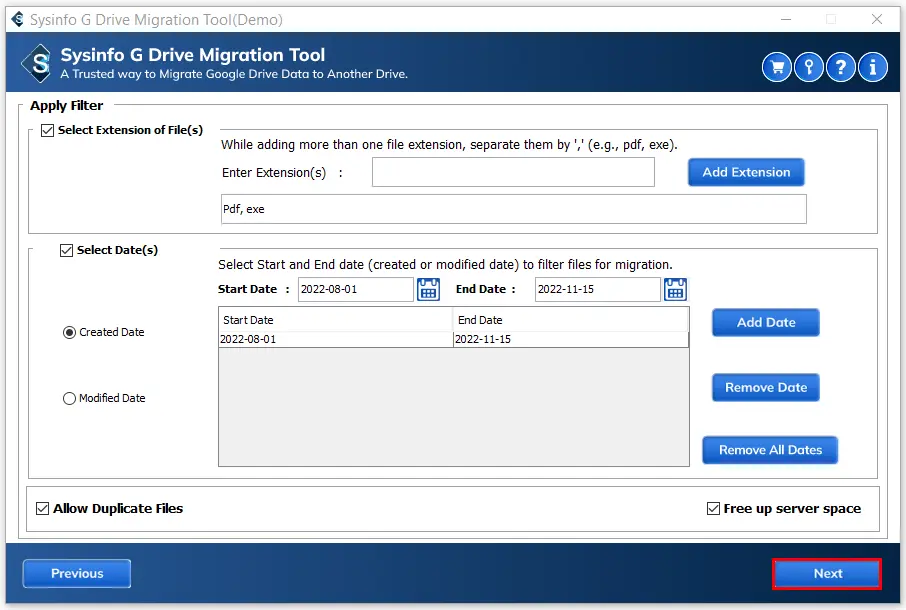
- You can also use features – Select Extension of File(s), and Select Date if required. Hit on the Next button.
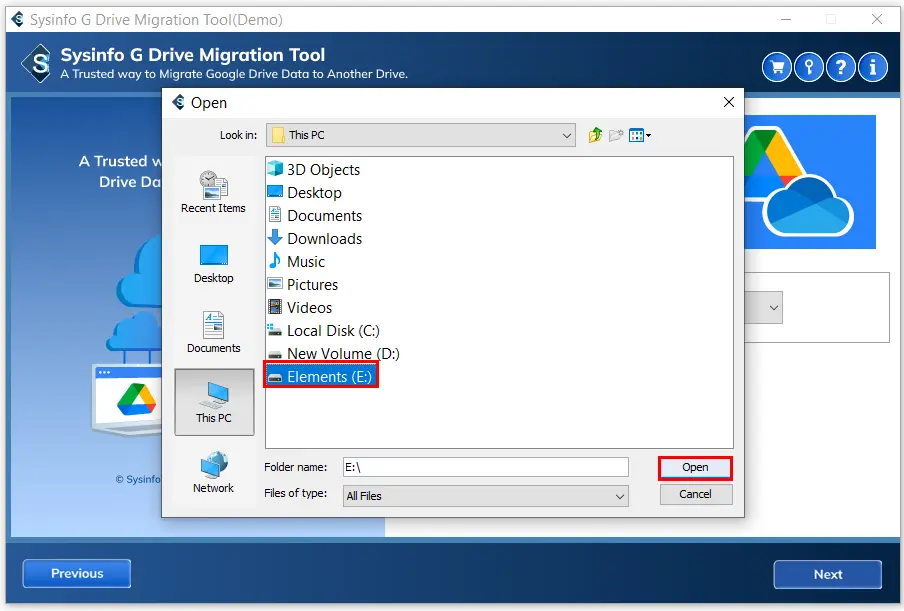
- After that, locate the Destination Drive to Local Drive. Press the Next Button.

- Set the location where you want to store the files in your local system.
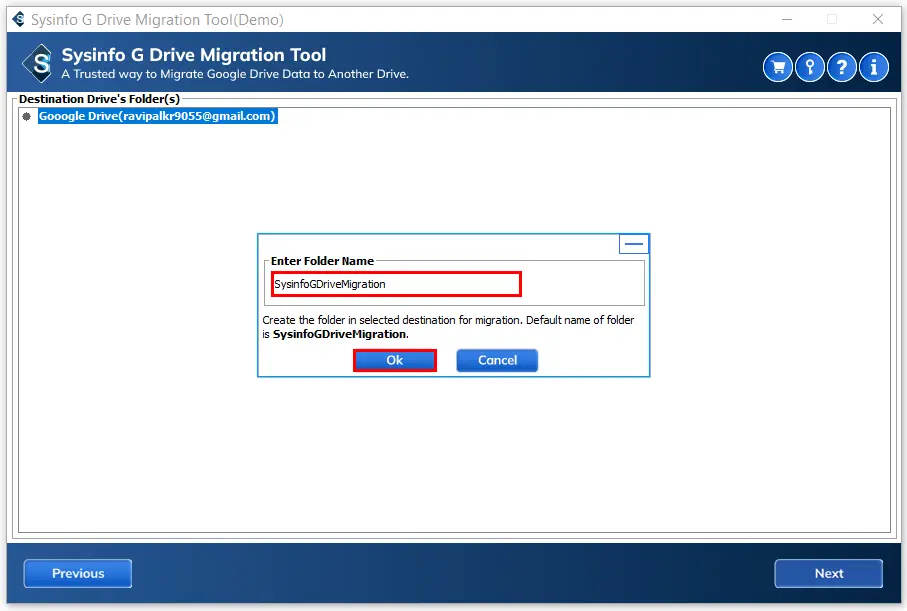
- Enter the name of a folder that you are storing on the local drive.
- In the end, if you want to download the report, you can also download it.
Conclusion:
In this guide, we have discussed two various methods. The first two methods are done by manual methods and the remaining, we have done by a third-party tool to backup Google Photos to hard drive. Users can easily see the difference when they perform one of the methods. At last, I just want to give suggestions that go with the professional method as it is a direct and simple method. Also, you can read another article for the best G Suite backup Solutions.
About The Author:
Related Post